
Background
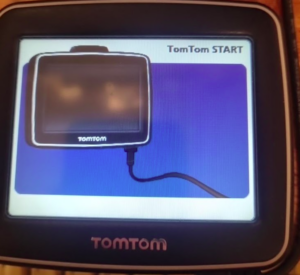
I recently found an old TomTom Start and started wondering what I could do with it. The hardware still works, it has a color LCD, a GPS receiver and an ARM processor, so throwing it away felt a bit boring.
The original idea was simple: could I get my own code running on it?
As a first goal, I decided that displaying my own image would be enough. Not replacing one of TomTom’s existing images, but actually running my own software and drawing directly to the display.
I expected this to take a few hours.
It didn’t.
First, what is actually inside a TomTom?
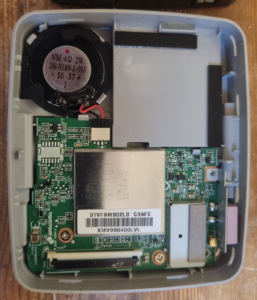
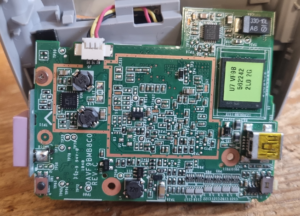
The first job was figuring out what the device was running.
The main firmware is stored in a file called ttsystem. After pulling that apart I found a Linux kernel and an initramfs containing the root filesystem.
The kernel identifies itself as:
Linux 2.6.13
And the hardware turned out to be an ARM926EJ-S:
Processor        : ARM926EJ-S
CPU architecture : ARMv5TEJ
Memory           : ~64 MB
So underneath the TomTom application there is basically a small ARM Linux computer.
An old one.
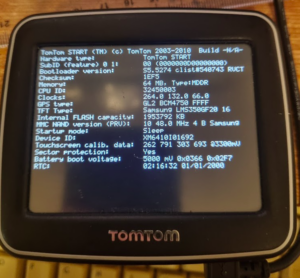
The Linux environment dates from a completely different era compared with the ARM Linux systems I’m used to working with today. The userspace has glibc 2.3.2 and uses an old ARM ABI.
That became important pretty quickly.
Getting something to run
While looking through the startup scripts I found something very useful.
During boot, the TomTom checks for:
/mnt/sdcard/ttntools/ttntool.shIf it exists, the script gets executed before the normal navigation software starts.
Perfect.
I could now put a shell script on the internal storage, reboot the TomTom and run my own experiments.
So naturally I compiled a small ARM program.
Segmentation fault.
I changed compiler options.
Segmentation fault.
I removed libc and wrote a tiny freestanding program.
Segmentation fault.
Eventually I reduced the program to a few lines of ARM assembly that should basically just exit.
Still a segmentation fault.
I even tried an executable where the first instruction simply branches back to itself forever. Same result.
At that point it became pretty clear that my actual program wasn’t the problem. Something was going wrong before, or just as, the program was being loaded.
If TomTom’s binaries work, what’s different about them?
Instead of continuing to throw compiler options at the problem, I started looking at executables that I knew worked.
The TomTom filesystem contains BusyBox, so I used that as my reference.
Running readelf on it showed an old 32-bit ARM ELF executable with some interesting properties. Among other things, its first loadable segment starts at 0x8000, uses an alignment of 0x8000, and it expects:
/lib/ld-linux.so.2as its dynamic loader.
There were also differences in the ARM ELF flags and program header layout compared with the executables my current toolchain was generating.
Rather than trying to solve the whole ELF problem immediately, I decided to try something slightly dirty.
I took the original BusyBox binary, kept its ELF structure intact and replaced the machine code at its entry point with my own ARM instructions.
My first test did almost nothing. It just exited with return code 42.
And…
result=42That was probably the most satisfying 42 I’ve seen in a terminal for quite some time.
My code was running.
It also told me something important. The ARM instructions generated by my toolchain weren’t fundamentally the problem. The old system simply didn’t like something about the ELF executables I had been generating.
For now, BusyBox could act as an ELF carrier while I worked on the more interesting parts.
Then came another bit of computing archaeology
Now that I could execute instructions, I needed to talk to Linux.
Normally on 32-bit ARM Linux you put the syscall number in r7 and execute swi 0.
Except that isn’t what this system expects.
The TomTom is old enough to use the ARM OABI syscall convention.
For example:
swi 0x900003    @ read
swi 0x900004    @ write
swi 0x900005    @ open
swi 0x900006    @ close
I wrote a small test using open(), write() and close() directly through these syscalls.
It created a file.
Good. I now had my own ARM code running and communicating directly with the original Linux kernel.
Time to find the display.
/dev/fb
Looking through the devices revealed:
/dev/fbThis is the Linux framebuffer device.
I wrote another little program that opened it and used the standard framebuffer ioctls to ask the driver about the display.
This came back:
Resolution        320 x 240
Virtual resolution 320 x 480
Bits per pixel    16
Line length       640 bytes
Framebuffer size  307200 bytes
Driver            s3c2443-tft-lcd
The color layout was:
Red:   5 bits
Green: 6 bits
Blue:  5 bits
So the display is using good old RGB565.
One pixel is two bytes, which means one complete screen is:
320 × 240 × 2 = 153600 bytesSomething else caught my attention.
The virtual framebuffer is 320 × 480 and the framebuffer contains 307200 bytes.
That’s exactly enough memory for two complete 320 × 240 images.
That might become useful later.
Actually putting pixels on the LCD
The next problem was getting access to the framebuffer memory.
Normally I’d just mmap() it.
Again, the age of the system made this slightly more interesting.
This kernel uses the old ARM version of the mmap syscall, where the arguments are placed in a structure and a pointer to that structure is passed to syscall 90:
swi 0x90005aAfter a little experimenting I got the framebuffer mapped into my process.
At that point everything suddenly became very simple.
The display was just memory.
I made my first test fill four parts of the screen with different RGB565 values:
0xF800  Red
0x07E0  Green
0x001F  Blue
0xFFFF  White
Reboot.
And there they were on the TomTom display.
Red, green, blue and white.
This was probably the real breakthrough. I wasn’t asking any TomTom application to display something for me anymore. My own ARM code was writing pixels directly into the framebuffer used by the LCD driver.
Finally, the logo
Once I could draw pixels, displaying an actual image wasn’t particularly difficult.
I wrote a small Python script on my PC that takes a 320 × 240 PNG and converts every pixel to RGB565:
pixel = ((r >> 3) << 11) | ((g >> 2) << 5) | (b >> 3)That produces exactly 153600 bytes of image data.
For the first version I simply included those bytes with my ARM program, mapped the framebuffer and copied the image into it.
And finally my AIVA Robotics logo appeared on the TomTom.
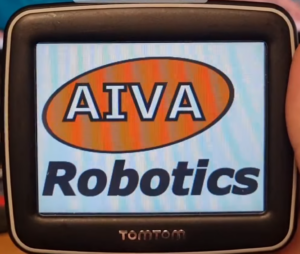
Which is slightly ridiculous when you consider the amount of work required to get there.
So no, I didn’t replace an image
When I posted a short video of this, someone commented that I had basically just replaced an image.
I wish.
That would have saved quite a few hours.
The image itself is actually the least interesting part of the project. It’s just 153600 bytes of RGB565 data.
What I actually had to do was extract the original firmware, investigate the ARM/Linux environment, work out why my modern ELF executables wouldn’t run, use an existing executable as a temporary ELF carrier, run my own ARM machine code, figure out the old OABI syscall interface, locate and query the framebuffer driver, get the old mmap() syscall working and finally write directly into framebuffer memory.
The resulting path looks roughly like this:
My PNG
   ↓
RGB565 converter
   ↓
My ARM code
   ↓
ARM OABI syscalls
   ↓
Linux 2.6.13
   ↓
/dev/fb
   ↓
s3c2443 framebuffer driver
   ↓
Framebuffer memory
   ↓
LCD
The TomTom software isn’t displaying my logo.
My program is.
There are still some ugly bits
The biggest one is the BusyBox trick.
I’m currently using the original BusyBox executable as a carrier because I know its ELF format is accepted by the TomTom. I replace code inside it with my own payload while retaining the ELF headers and layout.
It works, but I don’t want to leave it like that.
Now that I know the ARM code itself works, I can concentrate on finding exactly what the old loader expects. BusyBox gives me a known-good ELF to compare against, including its load addresses, alignment, ARM flags, interpreter and program headers.
The goal is to generate my own standalone ELF with the same required characteristics.
There’s another obvious improvement too.
At the moment the image is compiled into the payload. There’s no reason to do that.
I can instead have my program open something like:
/mnt/sdcard/ttntools/splash.rgb565and read the image directly into the memory-mapped framebuffer.
Then I can change graphics without touching the executable at all.
Where to go from here
Displaying a static logo was never really the end goal. It was just a convenient milestone because it forced me to understand the complete path from my own code down to the LCD.
Now I have native code execution, file access, delays, ioctl, memory mapping and direct framebuffer access.
That’s enough to start doing much more interesting things.
I’d like to clean up the build process first and get rid of the BusyBox carrier. After that, a small graphics library would be useful: pixels, lines, rectangles, text and bitmap loading.
And since I now know there are two full framebuffer pages available, I definitely want to experiment with page flipping as well.
There are also GPS, touch/input and other bits of hardware sitting inside this thing waiting to be investigated.
For a device that started out as an obsolete GPS in a drawer, there’s still quite a lot to play with.
And yes, after all that work, the first thing I made it do was display my logo.